- 1. Types of Service Activators
- 2. Making HTTP Requests
- 3. Connecting HTTP Requests with the PFE State
- 4. Defining Dynamic Path and Query Parameters
- 5. Reusing Service Activators
- 6. Available Options
- 7. Error Handling with Service Activators
- 8. Trigger Service Activators Through Code
Service Activators
Service activators can be used to do HTTP calls to the backend via pure configuration.
- Data from the state can be sent to the backend via a mapping configuration
- Response values from the backend can be written to the state via a mapping configuration
- Service activators can be executed conditionally
- Can be used to display server side validations on a page
- Can be combined with a dynamic form component to fill possible selections in a dropdown with a server side call.
Service activators can be triggered via PFE Actions.
Documentation of the configuration
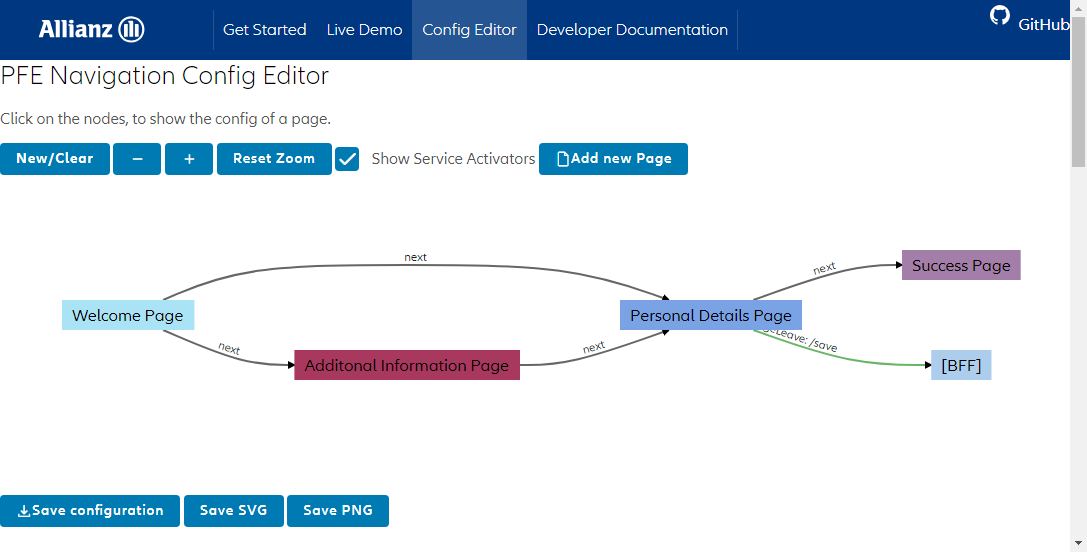
The configuration of service activators is also supported by the config editor:
1. Types of Service Activators
Service activators are typically triggered through onPageEnterActions or onPageLeaveActions page navigation hooks, via TRIGGER_SERVICE_ACTIVATORS action.
Check the actions section for more information.
Example :{
"pageId": "example",
"onPageEnterActions": [
{
"type": "PFE_TRIGGER_SERVICE_ACTIVATORS",
"serviceActivators": [
{
"globalConfigId": "pageEnterServiceActivatorId"
}
]
}
],
"onPageLeaveActions": [
{
"type": "PFE_TRIGGER_SERVICE_ACTIVATORS",
"serviceActivators": [
{
"globalConfigId": "pageLeaveServiceActivatorId"
}
]
}
]
}Full details about the execution order can be found here.
💡 If you are looking for a way to trigger HTTP calls during a backward navigation, you can simply use the
PFE_TRIGGER_SERVICE_ACTIVATORSaction in theonPageLeaveBackwardsActions. More details about PFE actions can be found here.
2. Making HTTP Requests
Configuring a service activator to make an HTTP request can be as simple as the snippet below. The configuration triggers a DELETE request when a user navigates away from the summary page.
{
  "path": "api/resource/123",
  "serviceActivatorMethod": "DELETE"
}
3. Connecting HTTP Requests with the PFE State
Often, you would need to incorporate user input into your HTTP request or update the PFE state with the response. This can be done via the requestDataMapping and responseDataMapping.
{
  "path": "parties/bank-details",
  "serviceActivatorMethod": "GET",
  "requestDataMapping": [
    {
      // Path to the request payload
      "requestDataExpression": "$.contractId",
      // Path to the state key that contains the desired value
      "stateKeyExpression": "$.selectedPolicy.contractId"
    }
  ],
  "responseDataMapping": [
    {
      // Path to the response payload
      "responseDataExpression": "$",
      // Path in the PFE state to store the response payload
      "stateKeyExpression": "$.customerBankAccounts"
    }
  ]
}
4. Defining Dynamic Path and Query Parameters
Utilizing dynamic data is not limited to the request payload, it can also be included in a path parameter or query parameter.
4.1. Path Params
PFE allows you to do this by setting up placeholders in the path and providing a mapping between those placeholders and the actual values from the state.
Example :{
"path": "parties/{partyId}/bank-details",
"serviceActivatorMethod": "GET",
"pathParams": [
{
"id": "partyId",
"value": "$.selectedPolicy.policyHolderId"
}
]
}4.2. Query Params
PFE allows to define a list of query params. The query params are automatically added at the end of the configured path.
Example :{
"path": "parties/bank-details",
"serviceActivatorMethod": "GET",
"queryParams": [
{
"name": "bankAccountType",
"value": "$.pages.bankDetails.selectedBankType"
}
]
}The previous configuration will produce:
Example :parties/bank-details?bankAccountType=SELECTED_BANK_TYPE_FROM_STATE5. Reusing Service Activators
It's a common scenario to use the same service activator multiple times across different parts of your application. Instead of configuring the entire service activator every time, you can define it as a global service activator and then reference it wherever necessary.
Example :{
"navConfiguration": {
"serviceActivators": {
// Define "deleteResource" as a global service activator
"deleteResource": {
"path": "api/resource/123",
"serviceActivatorMethod": "DELETE"
}
},
"pages": [
{
"pageId": "summary",
"onPageLeaveActions": [
{
"type": "PFE_TRIGGER_SERVICE_ACTIVATORS",
"serviceActivators": [
{
// Reference it using the "globalConfigId"
"globalConfigId": "deleteResource"
// Here you can override or extend the global settings if necessary
}
]
}
]
}
]
}
}6. Available Options
Beyond the basic setup, PFE offers various options to fine-tune how your service activators operate and interact with the PFE state.
| Option | Description | Default value |
|---|---|---|
path |
An endpoint or a relative path to the API server URL. This will be prefixed by the serviceActivatorEndpoint, which is a part of the ngxPfeModuleConfiguration configuration. |
- |
responseDataMapping |
How the response data should be mapped to the state. | - |
requestDataMapping |
How the state should be mapped to the request payload. | - |
serviceActivatorMethod |
HTTP method, such as GET, POST, PUT or DELETE. |
POST |
pathParams |
Mapping between path parameters and state keys. | - |
conditions |
A list of PFE conditions to decide whether the service activator should be executed. | - |
globalConfigId |
Id of a pre-defined service activator to be executed. | - |
async |
Whether the service activator should be executed asynchronously. This means, that the loading of a page is not blocked, when the service has not yet returned a result. | false |
asyncResolveBeforePageIds |
IDs of pages that should not be rendered until this service activator is finished. | - |
serviceActivatorResponseStatusHandlers |
Custom response handling per service activator. | - |
dontEmitInProgress |
Don't emit serviceActivatorCallInProgress$. |
false |
cleanStaleState |
Trigger stale state cleaning. | false |
updateStateValuesBefore |
Values in the state that should be updated before sending the HTTP call. | - |
mapUndefinedResponses |
Whether to save undefined or null response values to the state. |
false |
errorHandling |
Error handling configuration. | - |
displayMessage |
Short message to communicate what the system is doing. | - |
7. Error Handling with Service Activators
By default, a failure in a service activator call results in a redirect onto the global error page of the app. A failure is defined as any HTTP error response.
In general, the error handling can be configured in these locations:
- Directly with the service activator in question
- Globally. This is the default if no specific configuration is added to a service activator
Error Handling for a Specific Service Activator
The service activator configuration supports the definition of certain errorCases and how they should be handled.
This is done in the errorHandling attribute within the service activator configuration. The configuration itself defines an array of errorCases.
Every ErrorCase handling can define conditions that determine if it should become active or not.
The first valid errorCase out of all configured ones is then executed.
The execution of an error case follows these steps:
- Run the
errorResponseDataMappingconfigured in theerrorCase. This allows it to save data from the payload of the response into the state. It works the same as theresponseDataMappingfor successful service activators. - Execute the
actionsthat are configured in theerrorCase. This makes it possible to handle more specific behavior that is not covered by the standard configuration. The result of the action, directly translates to the behavior of the error handling. If the action returns true, the behavior is the same as with theignoreErrorflag. If it returns false, the behavior is the same as with thedisableErrorPageNavigationflag. An action can also trigger a custom navigation in this case. Alternatively, it is possible to ignore the action result with theignoreActionsResultflag. - After this, it is determined if the error should be ignored (
ignoreErrorflag). In this case, no further error handling is done and the service activator behaves the same as a successful one. - If the error was not ignored, it is checked if the error page navigation is disabled (
disableErrorPageNavigationflag). For example: If thedisableErrorPageNavigationis set for the error case of a service activator, that was triggered in theonPageLeave*, the navigation would be aborted and the user would stay on the current page. - If these flags are not set, the
errorPageNavigationof the service activator is used to determine the error page to go to. This navigation works similar to a standard navigation, but is able to access the payload of the error response. - If there is no
errorPageNavigationconfiguration, a fallback to the global error page is done.
A simple example configuration for a service activator with one error case could look like this:
Example :{
"path": "errorServiceActivator",
"errorHandling": {
"errorCases": [
{
"conditions": [
{
"type": "PFE_EXPRESSION",
"expression": "{$.response.status} === 404"
}
],
"disableErrorPageNavigation": true
}
]
}
}In this example, the service activator runs into a 404 response.
It is triggered when the page is left (onPageLeaveActions)
As the disableErrorPageNavigation flag is set, the user will stay on the page and the navigation will be aborted in case of the 404 response.
Conditions of an errorCase
The configuration of the errorCase conditions are the same as the standard navigation conditions. They do however have a few extra gimmicks.
The state is only available under $.state in these conditions. The error response is available under $.response,
which means that the response body for error responses is available under $.response.error.
The response headers are available under $.responseHeaders
The data model for this can be found here: ErrorCaseConditionsState.
They are converted into this structure: [index: string]: string[]
The background for this is, that response headers can have duplicates. So the same header could have multiple values.
An example could look like this:
Response headers:
Example :status: 400,
statusText:'error'
error: "Bad Request",
type: "REJECTION",
type: "this is a duplicate value of the type header"
message: "Http failure response for /path: 400 error",These response headers are then converted to the following data model and provided to the conditions:
Example :{
"type": ["REJECTION", "this is a duplicate value of the type header"],
"anotherHeader": ["something"]
}In this example, we only want the error case to become active, if the type header is set, with the value REJECTION.
If this value is not available, the error case should not become active.
This can be done with the following condition/expression:
Example :{
"expression": "{$.responseHeaders.type[?(@==\"REJECTION\")]}"
}This expression checks the values of the type header, if the value REJECTION is present.
To clarify, the following condition would lead to the same result. The extracted valued from the expression is REJECTION. This value is seen as truthy in the conditions.
{
  "expression": "{$.responseHeaders.type[?(@==\"REJECTION\")]} === 'REJECTION'"
}
A full example of a service activator call with a more complex error handling of errors could look like this:
Example :{
"path": "endpoint",
"errorCases": [
{
"conditions": [
{
"expression": "{$.response.status} == 400"
},
{
"expression": "{$.responseHeaders.type[?(@==\"REJECTION\")]} == 'REJECTION'"
}
],
"errorPageNavigation": [
{
"nextPageId": "errorPage"
}
]
},
{
"conditions": [
{
"expression": "{$.response.status} == 400"
}
],
"disableErrorPageNavigation": true
}
]
}This example configuration has the effect, that the user will only be navigated to the errorPage if the 400 response also contains the type header with the value REJECTION.
In all other cases, the navigation is stopped and the user stays on the page.
Actions
Actions that run within an error case can also influence the result of the error handling. If one of the actions returns a negative result (false), the error is thrown up. This has the same effect as the disableErrorPageNavigation flag.
errorPageNavigation
An example for a custom errorPageNavigation could look like this:
{
  "path": "endpoint",
  "errorCases": [
    {
      "conditions": [
        {
          "expresion": "{$.response.status} === 500"
        }
      ],
      "errorPageNavigation": [
        {
          "nextPageId": "myCustomErrorPage",
          "conditions": [
            {
              "expression": "{$.response.error.thisServer} === 'isCrashed'"
            }
          ]
        },
        {
          "nextPageId": "fallbackErrorPage"
        }
      ]
    }
  ]
}
The navigation to the myCustomErrorPage only happens if the response body contains the text isCrashed in the field thisServer for the response with the status code 500.
If that is not the case, the default fallbackErrorPage is used.
Global Error Page Configuration
The errorPageNavigation configuration can be used to define conditions that determine the error page that should be displayed.
Example for such a configuration:
Example :{
"navConfiguration": {
"errorPageNavigation": [
{
"nextPageId": "teapotError",
"conditions": [
{
"expression": "{$.response.status} == 418"
}
]
},
{
"nextPageId": "defaultErrorPage"
}
]
}
}The conditions to determine if a navigation to an error page should happen are similar to the NavOptionConfig conditions. But in difference to those, the PFE state is only available under $.state in the error page navigation conditions.
Additionally the response data is available:
- The error response is available under
$.response - The http status is available under
$.response.status - The response body for error responses is available under
$.response.error - The response headers under
$.responseHeaders
The errorResponseDataMapping in the errorCases configuration of a specific service activator can be used to write the error response data to the state before the error page navigation is triggered.
Example for a Service Activator for a Validation
The user will only be able to navigate, once the service returned a non-error response
Example :{
"path": "some-service/validate",
"serviceActivatorMethod": "POST",
"preventNavigationOnError": true,
"requestDataMapping": [
{
"requestDataExpression": "$.fieldToValidate",
"stateKeyExpression": "$.userdata.fieldToValidate"
},
{
"requestDataExpression": "$.anotherFieldToValidate",
"stateKeyExpression": "$.userdata.anotherFieldToValidate"
}
],
"responseDataMapping": [
{
"responseDataExpression": "$",
"stateKeyExpression": "$.someService.validationStatus"
}
],
"serviceActivatorErrorHandlingExcludeStatusCodes": [404, 400],
"serviceActivatorResponseStatusHandlers": [
{
"statusCode": 400,
"stateKeyExpression": "$.validationErrorData",
"stateValue": "common.validation.formatError"
},
{
"statusCode": 404,
"stateKeyExpression": "$.validationErrorData",
"stateValue": "common.validation.notFoundError"
}
]
}8. Trigger Service Activators Through Code
While it is recommended to rely on the trigger points of the navigation flow, it is also possible to trigger service activators directly in the code.
The PfeBusinessService provides the triggerSingleServiceActivator() for this.
It can be used like this:
Example :this.pfeBusinessService
.triggerSingleServiceActivator('serviceActivatorId')
.then((response) => {
// The full HTTP response of the service activator is available here
})
.catch((error) => {
// The full HTTP error response of the service activator is available here
});By default, the PFE error handling is active for every service activator. That means an automatic navigation to the error page is triggered.
It might be desirable to stay on the current page, for example if the error is supposed to be handled manually in the code of the catch block. This can be done, by disabling the navigation to the error page for the service activator in question. For example:
Example :{
"errorServiceActivator": {
"path": "http://example.com/this-is-a-404",
"serviceActivatorMethod": "GET",
"errorHandling": {
"errorCases": [
{
"disableErrorPageNavigation": true
}
]
}
}
}